


Step-by-Step Guide: How to Create a Custom Post Type in WordPress
- Khalid Bin Ahsan
- April 5, 2023
- 4:41 am
- One Comment
Custom post types are an excellent feature in WordPress that allows you to create your own content types with their own unique fields and capabilities. By creating a custom post type, you can add content that doesn’t fit the default post or page types. In this blog post, we’ll provide you with a step-by-step guide on how to create a custom post type in WordPress.
Step 1: Understanding Custom Post Types
Before you start creating a custom post type, you should understand what it is and why it is useful. A custom post type is a content type that you can add to WordPress, which has its own set of fields and capabilities. For example, you might create a custom post type for a portfolio, team members, testimonials, or products. These types of content are not suitable for the default post or page types.
Step 2: Install Custom Post Type Plugin
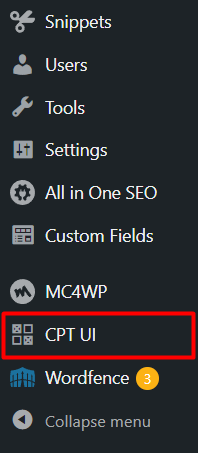
The easiest way to create a custom post type is by using a plugin. There are several free and paid plugins available in the WordPress repository. In this tutorial, we’ll use the Custom Post Type UI plugin, which is free and easy to use. Once you install and activate the plugin, you’ll see a new menu item called “CPT UI” in the WordPress dashboard.
Step 3: Create a Custom Post Type
To create a custom post type, navigate to the “CPT UI” menu item in the WordPress dashboard and click on “Add/Edit Post Types.” Then, click on the “Add New” button to create a new custom post type. You’ll need to provide a name for your post type, a slug, and a description. You can also add labels, menu icons, and other settings.
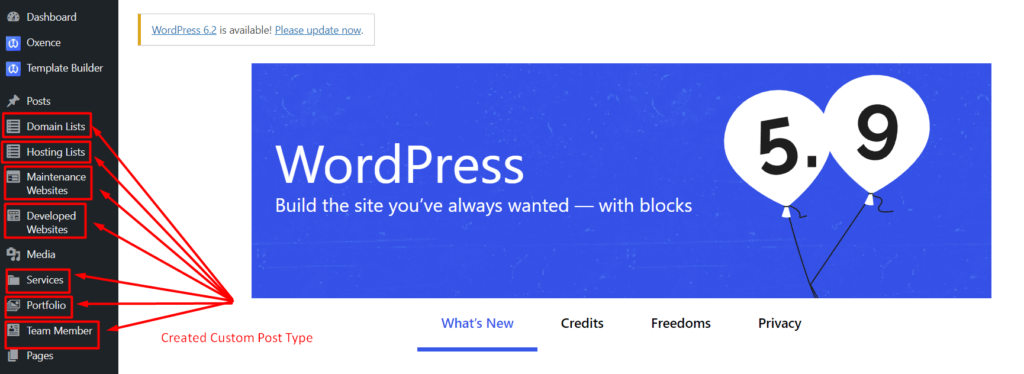
Step 4: Publish Your Custom Post Type
Finally, you can publish your custom post type by clicking on the “Publish” button. Your custom post type will now be available in the WordPress dashboard, and you can start adding content to it. You can also customize the display of your custom post type by editing the template files or by using a page builder plugin like Elementor.
Step 5: Add Custom Fields and Taxonomies
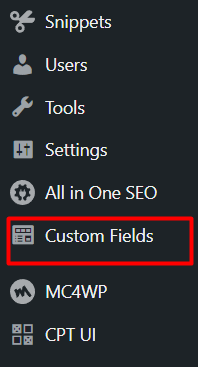
Once you’ve created your custom post type, you can add custom fields and taxonomies to it. Custom fields are extra data fields that you can add to your post type, such as an image, a price, or a date. Taxonomies are a way to organize and group your custom post types, such as categories or tags. You can do this with the plugin Advanced Custom Fields (ACF) to add custom field into your custom post type
How to display Custom Post Type ?
If you are already created your Custom Post Type and added your Custom Fields and Taxonomies, there some easy way to display your Custom Post Type post with some php code:
					<?php
$args = array(
	'post_type' => 'your_post_type_name',
 	'orderby' => array( 'meta_value_num' => 'ASC', 'ID' => 'ASC' ),
	'posts_per_page' => 10000,
);
$query = new WP_Query($args);
?>
        <table class="custom-tbl" id="data-table">
			<thead>
				<tr class="tbl-head">
					<th>Serial</th>
					<th>Domain Name</th>
					<th>Client</th>
					<th>Potential price</th>
					<th>Provider</th>
					<th>With account</th>
					<th>Renewed on</th>
					<th>Expires on</th>
				</tr>
			</thead>
			<tbody>
		<?php if($query->have_posts()):;
   			$i = 0;?>
   		 <?php while($query->have_posts()) : $query->the_post();
			$i++; ?>
        <tr class="tbl-list-item">
            <td style="text-align: center"><?php echo $i; ?></td>
            <td><?php the_title(); ?></td>
            <td><?php echo the_field('client_name'); ?></td>
			<td><?php echo the_field('potential_price'); ?></td>
			<td><?php echo the_field('provider'); ?></td>
			<td><?php echo the_field('with_account'); ?></td>
			<td><?php echo the_field('renewed_on'); ?></td>
			<td><?php echo the_field('expired_on'); ?></td>
        </tr>
	<?php endwhile;?>
	<?php endif;?>
	</tbody>
    </table>
Note: add this code to your code snippet, copy your snippet shortcode, and paste it where you want to display it. the_field() function comes from Advanced Custom Fields (ACF) plugin field name.
If you want to display Custom Post Type without downloading this plugin, you should create a file and folder in your theme root folder like this: includes>>domain-list.php and create a shortcode to your theme functions.php file.
					function domain_list() {
	ob_start();
	get_template_part('includes/domain', 'list');
	return ob_get_clean();

}
add_shortcode('domain_list', 'domain_list');
How to display Custom Post Type By Taxonomies term
If you want to display your Custom Post Type by your Taxonomies term, your code should be like this:
					<?php
$args = array(
    'post_type' => 'your_post_type_name',
    'taxonomy' => 'your_taxonomies_name',
    'term' => 'taxonomies_term,
    'nopaging' => true,
    'meta_key'  => 'your_ordering_field_name',
    'orderby'   => 'meta_value_num',
    'order'  => 'ASC',
    'posts_per_page' => 10000,
);
$query = new WP_Query($args);
?>
        <table class="custom-tbl" id="data-table">
			<thead>
				<tr class="tbl-head">
					<th>Serial</th>
					<th>Domain Name</th>
					<th>Client</th>
					<th>Potential price</th>
					<th>Provider</th>
					<th>With account</th>
					<th>Renewed on</th>
					<th>Expires on</th>
				</tr>
			</thead>
			<tbody>
		<?php if($query->have_posts()):;
   			$i = 0;?>
   		 <?php while($query->have_posts()) : $query->the_post();
			$i++; ?>
        <tr class="tbl-list-item">
            <td style="text-align: center"><?php echo $i; ?></td>
            <td><?php the_title(); ?></td>
            <td><?php echo the_field('client_name'); ?></td>
			<td><?php echo the_field('potential_price'); ?></td>
			<td><?php echo the_field('provider'); ?></td>
			<td><?php echo the_field('with_account'); ?></td>
			<td><?php echo the_field('renewed_on'); ?></td>
			<td><?php echo the_field('expired_on'); ?></td>
        </tr>
	<?php endwhile;?>
	<?php endif;?>
	</tbody>
    </table>
As I mentioned above that you can create a shortcode by code snippet plugin or create your custom shortcode to your theme functions.php file
How to add column to your Custom Post Type
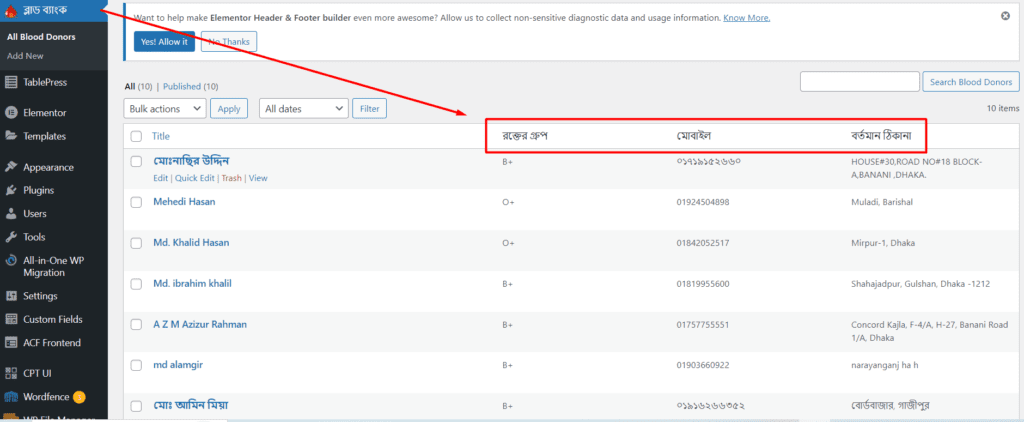
You can add this kind of column to your custom post type by following code. First, go to your theme functions.php file and add this code:
					// Adding the custom columns to the custom post type
function your_function_name($columns) {
    unset( $columns['author'] );
	$columns['your_field_name1'] = __( 'Name', 'your_field_name1' );
    $columns['your_field_name2'] = __( 'Mobile', 'your_field_name2' );
	 $columns['your_field_name3'] = __( 'Address', 'your_field_name3' );

    return $columns;
}
add_filter( 'manage_your_post_type_name_posts_columns', 'your_function_name' );
Note: You can get your_field_name from Advance Custom Field (ACF) plugin. Now you should insert data to your column by following code
					// Add the data to the custom columns for the custom post type
function your_function_name2( $column, $post_id ) {
    switch ( $column ) {

        case 'your_field_name1' :
            echo get_post_meta( $post_id , 'your_field_name1' , true );
            break;

        case 'your_field_name2' :
            echo get_post_meta( $post_id , 'your_field_name2' , true );
            break;
		case 'your_field_name3' :
            echo get_post_meta( $post_id , 'your_field_name3' , true );
            break;

    }
}

add_action( 'manage_your_post_type_name_posts_custom_column' , 'your_function_name2', 10, 2 );
Note: You can get your_field_name from Advance Custom Field (ACF) plugin.
Tags
- Advanced Custom Fields, Content Types, CPT UI Plugin, custom post type, custom post type archive page, custom post type generator, custom post type plugin, custom post type register, custom post type supports, custom post type template, custom post type ui, Page Builder Plugins, Taxonomies, Template Files, Website Customization, Website Development, wordpress
Have any questions? Contact Me or left your comment below.
Category
Latest Posts
-
How to block a site from your PC hosts
-
How to install Vue js in your machine
-
Contact form 7 to new post on your custom post type
-
Maximize Your Site's Potential: How to Increase WordPress Maximum Upload File Size
-
Solve All-In-One WP Migration Stuck While Importing with These Easy Simple Steps
-
Boost Your Website Design with Elementor Pro: Free Download Available Now!
Stay Connected
About Me

Khalid Bin Ahsan
Full Stack Web Developer
Recent Comment
Email: developer@darkcyan-octopus-776743.hostingersite.com
Thank you